If you trust your Arduino more than your green thumb, this project is right for you. A sensor monitors the moisture in the soil – as soon as a certain value is undercut, a water pump starts up and waters your plant. Once the soil is moist enough again, your Arduino stops the pump.
Discover how to keep your plants alive and thriving with an Arduino-powered automatic plant watering system in our Google-powered podcast episode:
For this project you need the following components:
- Arduino UNO
- Moisture sensor
- Relay module
- Mini water pump
- Battery holder
Project Setup with the Arduino UNO
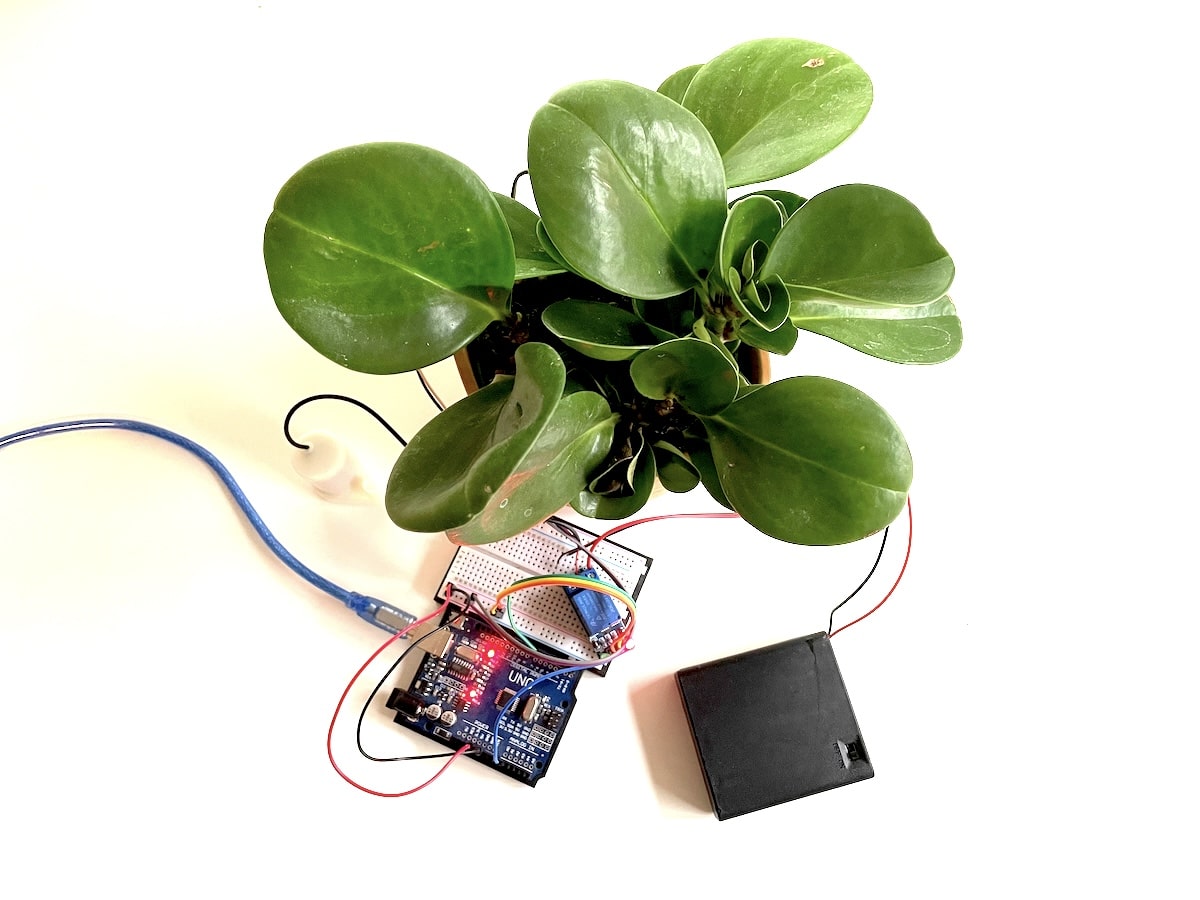
For your automatic plant watering system, you need an Arduino, a moisture sensor, a water pump, a 5V relay, and a box for four 1.5V batteries in addition to the Arduino. These can be AAA batteries as shown in the picture below, but I used the common AA type myself. You need the extra batteries because your Arduino doesn’t provide enough power for the water pump.
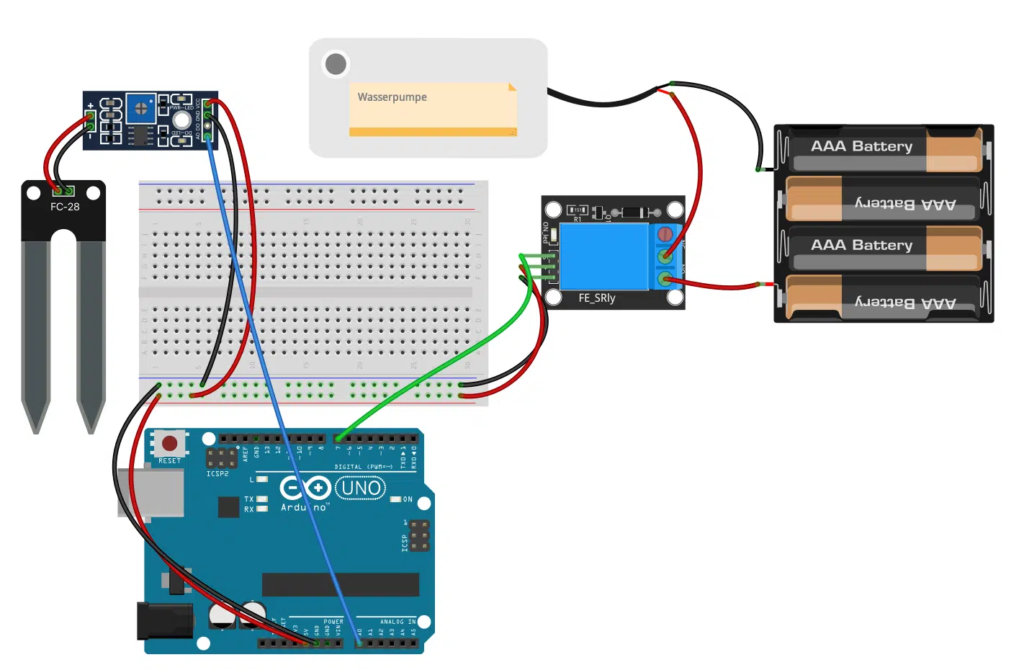
You only need the breadboard to pass the ground and 5V from the Arduino to the sensor and relay – of course you can come up with another solution for this.
___STEADY_PAYWALL___
Orient yourself to the sketch above when building the project. A note about the relay: The pin assignment may vary on your model – make sure to connect the right pin for the signal to your Arduino.
How the Project Works
Before we turn to the sketch, a few words about how it controls your Arduino plant watering system: The moisture sensor is of course stuck in the soil of the plant you want to water automatically. Your Arduino reads the current moisture value from the analog pin (blue cable). As soon as a value you set is exceeded, the Arduino sends a signal to the relay (green cable).
Now the relay opens the connection between the NO (Normally Open) and COM (Common Pin) pins. Thus, the current can flow from the batteries to the water pump. Another safety note: I strongly advise against controlling household appliances that are not intended for experimenting with Arduino & Co. via a relay.
The pump itself lies in the water and now begins to pump water through a hose into the plant soil. This decreases the moisture value (although the moisture actually increases, of course). As soon as a certain value is undercut, i.e. the soil is moist enough, your Arduino sends the signal to the relay to close the connection between the water pump and the batteries.
The Sketch for Plant Watering
Only a few lines of code are necessary to put your project into operation. Copy the following sketch and upload it to your Arduino:
int humidity = 0;
const int humidityPin = A0;
const int pumpPin = 7;

void setup() {
  Serial.begin(9600);
  pinMode(humidityPin, INPUT);
  pinMode(pumpPin, OUTPUT);
}

void loop() {
  humidity = analogRead(humidityPin);
  Serial.print("Feuchtigkeit: ");
  Serial.println(humidity);
  delay(200);

  if(humidity > 900) {
    digitalWrite(pumpPin, HIGH);
    delay(1000);
  }
  else {
    digitalWrite(pumpPin, LOW);
  }
}
First, you need a variable for the moisture value, here humidity. Then you set the two pins for the moisture sensor and the relay.
In the setup, you only start the Serial Monitor and set the respective pinMode: A signal is received at pin A0 (so INPUT), you output a signal via digital pin 7 (so OUTPUT).
In the loop, the following happens: Using the analogRead() command, you read the current moisture value and display it in the Serial Monitor – the drier the soil, the higher the value. One could consider whether the value should rather be called a “dryness value”. 😉
If a value you set (in the sketch above, this is the value 900) is exceeded, your Arduino sends the HIGH signal to the relay. This then ensures that the water pump receives power from the batteries. If the value is not exceeded, the code jumps back to the beginning of the loop.
This is how you determine the right value for your specific plant watering: Wait until the plant soil has become so dry that you would normally water it. Now stick the moisture sensor in and read the value. You can then use this number in your if statement.
With this simple yet effective setup, you can ensure your plants receive consistent care, even when you’re away or forgetful. This project is an excellent introduction to combining sensors, actuators, and Arduino programming for practical applications. As you become more comfortable with the system, you might consider expanding it to water multiple plants or adding features like a water level sensor for the reservoir. Remember to periodically check the system and adjust the moisture threshold as needed, as different plants may have varying watering requirements. Happy gardening with your new Arduino assistant!
