Before you can get started, you first need to connect your LED to the Arduino UNO. For this, you’ll need an LED, a 220Ω resistor, a breadboard, and three cables.
First, a few words about the breadboard (prototyping board). Here you can easily place components by simply inserting them. Under the holes run conductive strips that allow current to flow between the holes:
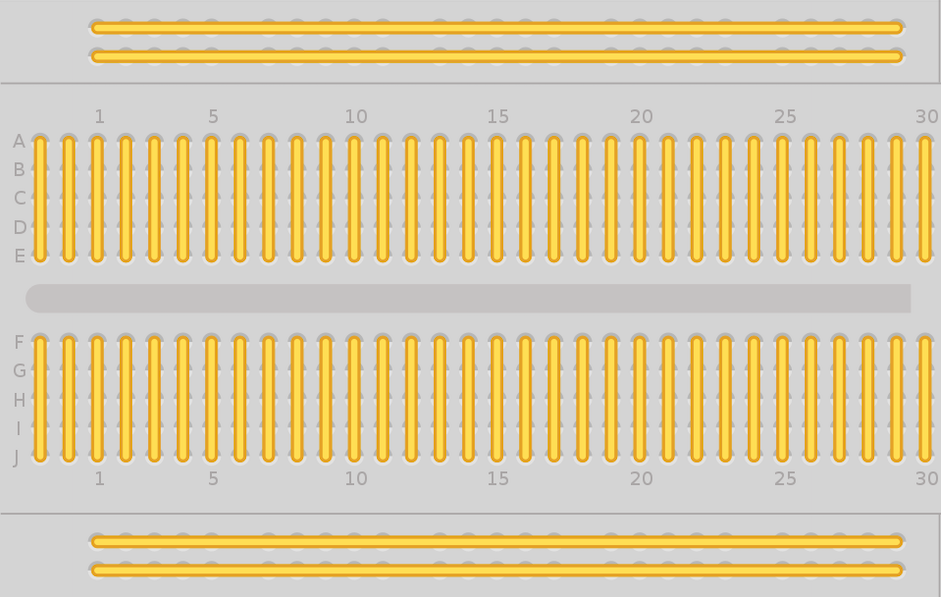
As you can see, the current runs horizontally across the breadboard on two strips at the top and bottom. These are typically marked with + and – on most boards. You connect these strips to the 5V and GND pins of your Arduino, so that you can then draw power from these strips for your components.
The holes have smaller strips arranged perpendicularly to these. Here, the current always flows beneath the five holes in a row. In the middle of the breadboard is a “bridge” that divides it into two separate areas across which no current flows.
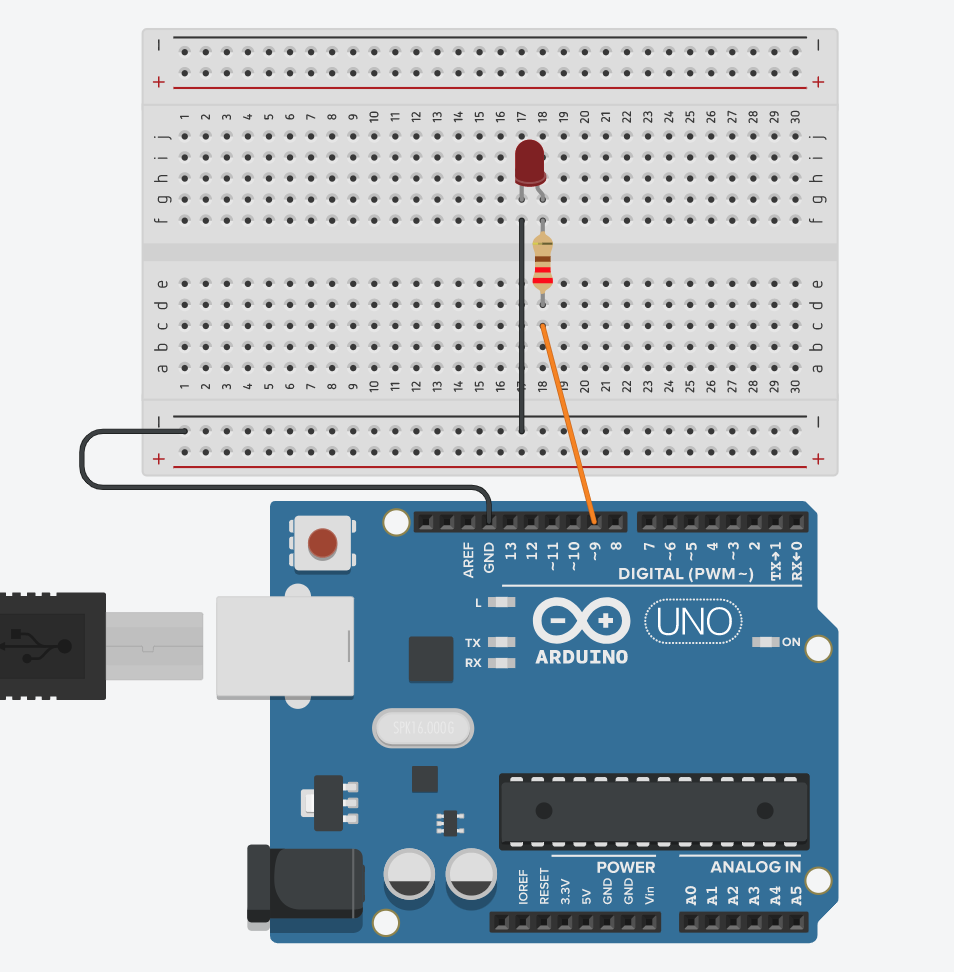
Back to the LED: Use the following diagram for guidance when setting up:
Let’s first talk about the LED. It has two legs of different lengths – the longer one is called the anode and is the positive pole. The shorter one is the cathode, the negative pole. For the LED to light up, current must flow through it.
___STEADY_PAYWALL___
However, you need a so-called current-limiting resistor for every LED. This is because an LED always draws as much current from the source as it can get – it cannot regulate its consumption itself. The longer it burns, the more conductive it becomes. This means that its power consumption also continues to increase. This is where the resistor comes in, which consumes a certain amount of current itself and leaves the LED only with the amount of current it can handle.
If you were to connect the Arduino directly to the LED without a resistor, it would draw more and more current over time and thus become hotter – until it eventually burns out.
Connect the anode – along with the resistor in between – to digital pin 9 of your Arduino. Connect the cathode to ground – that is, to GND.
And that’s all you need to do. Let’s continue with controlling the LED.
